To date, almost all QA Engineers have been testing Web and Mobile applications almost exclusively. But have you ever thought of Windows Desktop application test automation? I believe the thought crossed your mind at some point.
Getting a request to perform or test some actions on desktop applications is especially likely if you are working on a large-scale project. When this happens, your E2E or integration tests may be dependent on some sort of desktop file processor, payment processor, job executor, and similar windows desktop application.
Windows Application Driver
Windows Application Driver (WinAppDriver) is a service supporting Selenium-like UI Test Automation on Windows Applications. WinAppDriver supports testing Universal Windows Platform (UWP), Windows Forms (WinForms), Windows Presentation Foundation (WPF), and Classic Windows (Win32) apps on Windows 10 PCs.
The best thing about it is the fact that it looks and feels exactly like Selenium WebDriver. You can easily include it in your Selenium WebDriver testing framework.
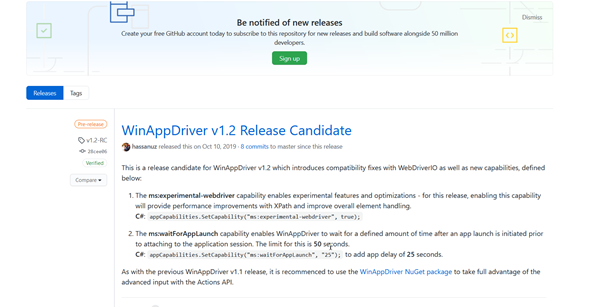
Navigate to the WinAppDriver GitHub web page and download the latest version. I downloaded the 1.2 version.
The installation process is straightforward and simple: Next, Next, and Finish.
After installation, you will find the diver at C:\Program Files (x86)\Windows Application Driver location.
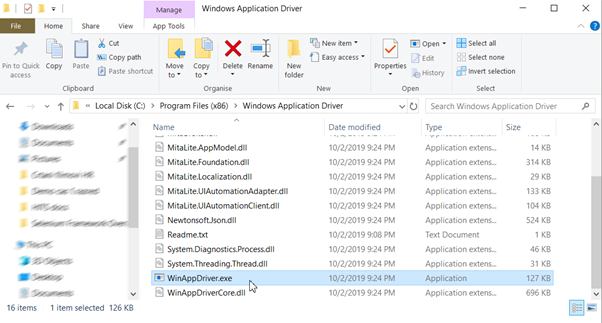
Let s try running it. Double-clicking on the WinAppDriver.exe won t do it a screen will just blink in front of your eyes.
Now open CMD prompt, navigate to the WinAppDriver location, and start the application:
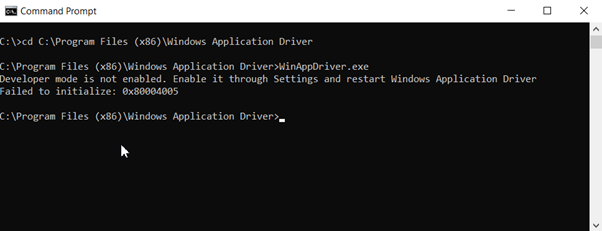
Oops we got an error 🙁
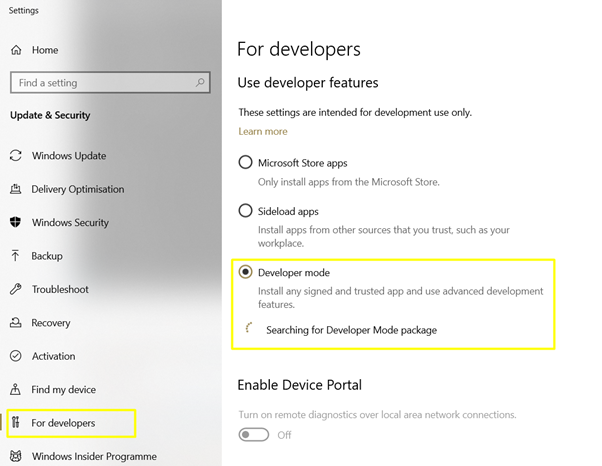
Developer mode is not enabled. Enable it through Settings and restart Windows Application Driver
Failed to initialize: 0x80004005
First, we need to enable Developer mode on our Windows 10.
Go back to CMD and run the app once again.
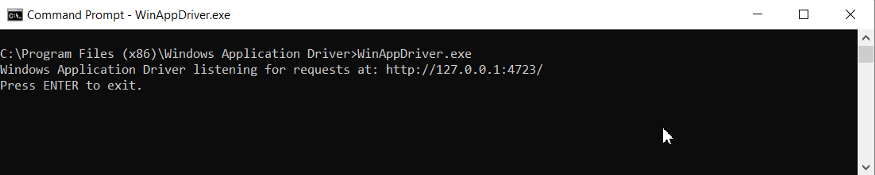
Wooohooo, it is all set now!
The app is running locally and listening to the 4723 port.
Element Inspector
In order to perform actions, we need to declare elements according to their locators. For web applications, it is easy. We can use Browser Developer Tools or some cool plugin of your choice. In the desktop apps world, the situation is slightly different we need to use the Element Inspector.
Element Inspector (Inspect.exe) is a Windows desktop tool that helps us select any UI element and view the element s properties just like the browser s developer tools.
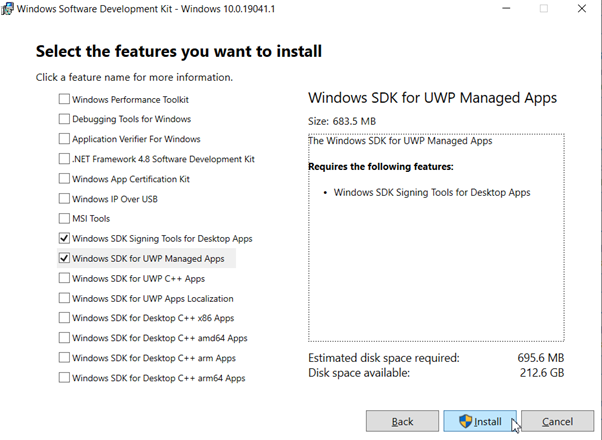
If you have Microsoft Visual Studio installed, you will most likely have Element Inspector already installed on your machine. Navigate to the C:\Program Files (x86)\Windows Kits\10\bin\10.0.19041.0\x64 location or search the root drive for “inspect.exe”. In case you do not have it installed, navigate to the Windows 10 SDK site, download and install it.

There is no need to install all the features. Simply select just two shown in the screenshot below.
Search the computer for it and run it to make sure it works.

Run the inspect.exe and make sure it is working fine.
Hello World
In order to start the automation, we need an automation candidate test case. For demo purposes, let us use the following test case:
Test Case: Test Notepad s replace test feature
Step 1: Open Notepad.exe
Step 2: Enter “Hello World”
Step 3: Click on Edit > Replace
Step 4: Replace “World” with “QA Engineers”
Step 5: Verify “Hello QA Engineers” displayed correctly
It is time to put our hands, or mouse pointer, on it. Instruction on how to install and setup .NET Core can be found here.
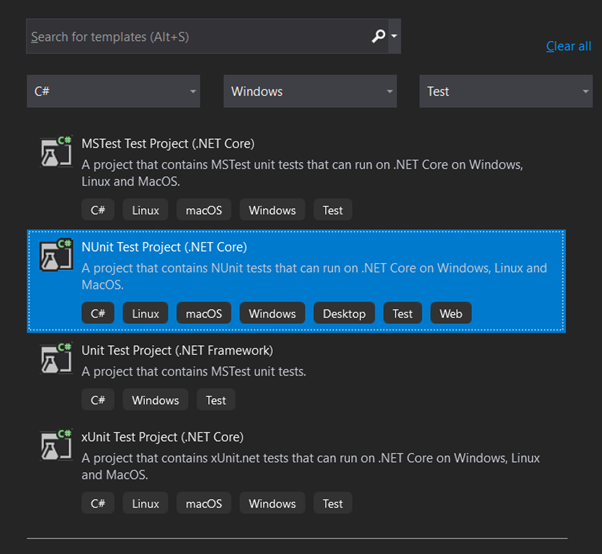
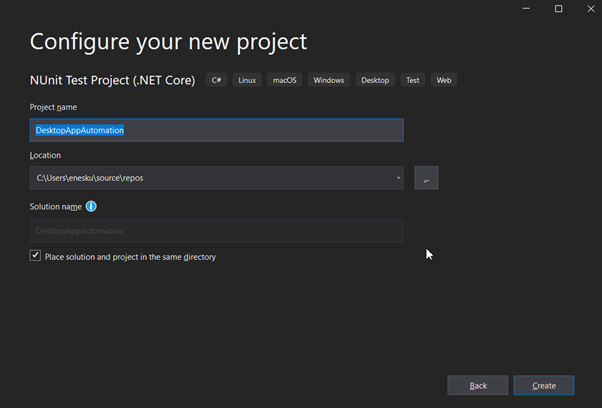
1. Create a new NUnit test project
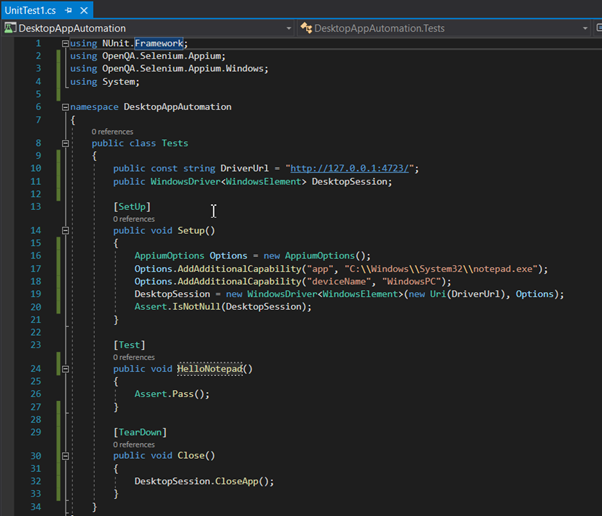
2. Update an existing UnitTest1.cs class as follows:
using NUnit.Framework;
using OpenQA.Selenium.Appium;
using OpenQA.Selenium.Appium.Windows;
using System;
namespace DesktopAppAutomation
{
    public class Tests
    {
        public const string DriverUrl = "http://127.0.0.1:4723/";
        public WindowsDriver<WindowsElement> DesktopSession;
[SetUp]
        public void Setup()
        {
            AppiumOptions Options = new AppiumOptions();
            Options.AddAdditionalCapability("app", "C:\\Windows\\System32\\notepad.exe");
            Options.AddAdditionalCapability("deviceName", "WindowsPC");
            DesktopSession = new WindowsDriver<WindowsElement>(new Uri(DriverUrl), Options);
            Assert.IsNotNull(DesktopSession);
        }
[Test]
        public void HelloNotepad()
        {
            Assert.Pass();
        }
[TearDown]
        public void Close()
        {
            DesktopSession.CloseApp();
        }
    }
}
3. Run the test
Note: If some references or packages are missing, right-click on it and include it in the solution.

Good! You might notice that a notepad screen blinked in front of your eyes during test execution. We are not supposed to use explicit waits but for demo purposes, we can add it at the point after DektopSession initialization.
Note: in case the test errors out with a message “OpenQA.Selenium.WebDriverException : A exception with a null response was thrown sending an HTTP request to the remote WebDriver server for URL http://127.0.0.1:4723/session.” make sure that WinAppDriver.exe is running.
OK, so far we made nice progress. It is time to get some elements and to perform actions.
4. Create Windows Elements and perform actions
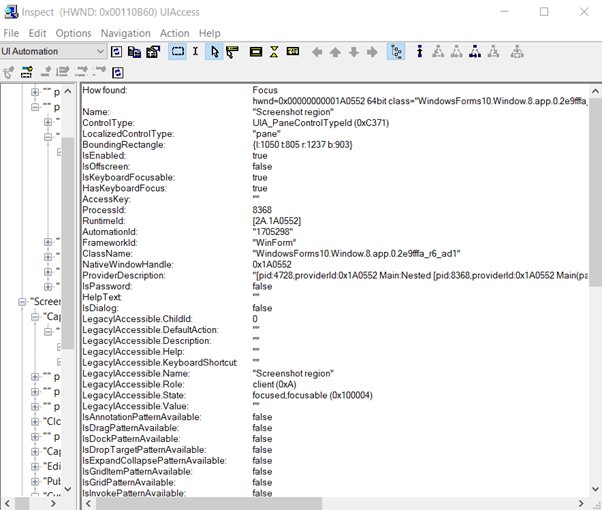
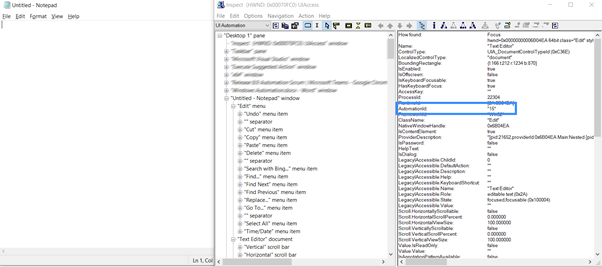
Open up application under test (AUT), in our case it is Notepad.exe, and Inspect.exe tool to fetch locators.
Click on the Notepad text area and find the AutomationId attribute on the right-hand side of the Inspect.exe tool. In my case, it is 15.
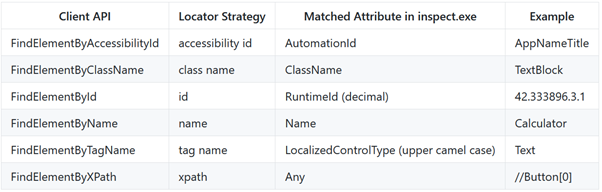
Windows Application Driver supports various locators to find UI elements in the application session. The table below shows all supported locator strategies with their corresponding UI element attributes shown in Inspect.exe.
Bring back our IDE, create a new element, and perform an action.
WindowsElement NotepadTextArea = DesktopSession.FindElementByAccessibilityId(“15”);
NotepadTextArea.SendKeys(“Hello World”);
Repeat the process for other elements.
WindowsElement EditButton = DesktopSession.FindElementByName(“Edit”);
EditButton.Click();
WindowsElement ReplaceButton = DesktopSession.FindElementByAccessibilityId(“23”);
ReplaceButton.Click();
WindowsElement FindWhatInput = DesktopSession.FindElementByAccessibilityId(“1152”);
FindWhatInput.Clear();
FindWhatInput.SendKeys(“World”);
WindowsElement ReplaceWithInput = DesktopSession.FindElementByAccessibilityId(“1153”);
ReplaceWithInput.Clear();
ReplaceWithInput.SendKeys(“QA Engineers”);
WindowsElement ReplaceAllButton = DesktopSession.FindElementByName(“Replace All”);
ReplaceAllButton.Click();
WindowsElement CancelButton = DesktopSession.FindElementByAccessibilityId(“2”);
CancelButton.Click();
Assert.AreEqual(“Hello QA Engineers”, NotepadTextArea.Text);
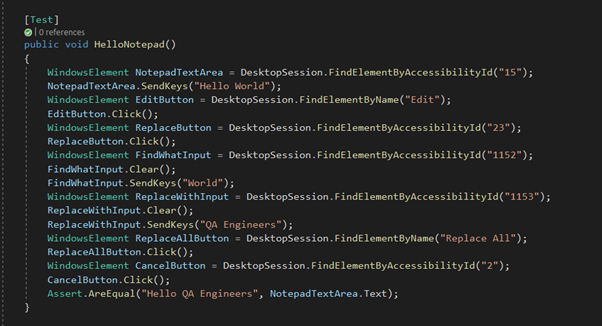
The test method now should look like the screenshot below.
Run the test!
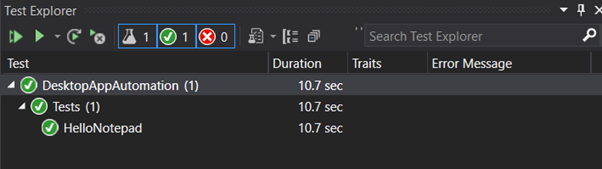
Eureka! It works! You can see the test execution gif here.
It is important not to touch anything during the test execution since if you move the focus, or start typing it will bring down the test.
Wake up Windows Application Driver! We need you.
The main bottleneck here is the fact that WinAppDriver needs to be running prior to the test execution process. We can fix it by starting it as a windows service.
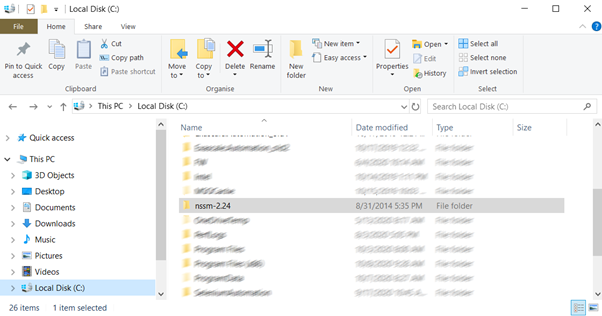
Navigate to the https://nssm.cc/ site and download the app.
Save it to the system root drive and add the exe file location to Environment Variables.
Open the CMD as administrator and execute the command:
nssm install “WinAppDriver” “C:\Program Files (x86)\Windows Application Driver\WinAppDriver.exe”

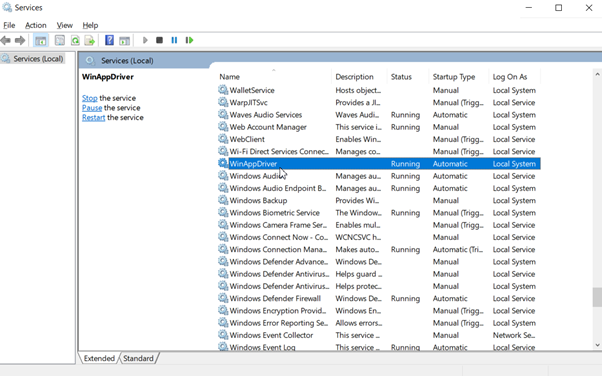
Open Services and start the WinAppDriver service. In the Properties section, set it to run automatically.
Closing Words
I think that we can all agree that desktop automation is fun. It has a Selenium look and feel, after all. However, I do not like the fact that AUT needs to be in focus and the tests are failing if you lock the computer during test execution. The good thing is that we have a simple and free tool for any desktop automation request.
Till the next time, happy testing!
I believe we can all agree that desktop development is entertaining. After all, it has a Selenium look and feel to it. However, I dislike the fact that the AUT must be in focus and that the tests will fail if the machine is locked during test execution. The good news is that for each desktop automation requirement, we offer a simple and free tool.
Hey there,
thank for great tutorial,
however, can we automate the windows app installing process?
thanks!