
Following my previous article, we are going to continue with an introduction to React Native. Assuming you have everything set up and ready, and you have created your first project and have seen “Hello world!” on the screen, what s next?
Well We have been instructed to open App.js and made our modifications. So, let s look into the project folder.

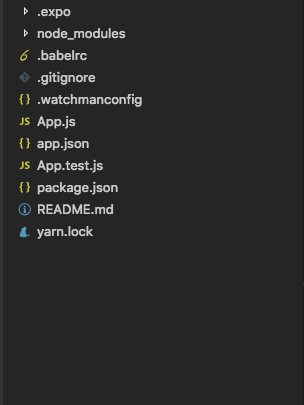
Before we continue I would like to mention that for this lesson I am using create-react-native-app, therefore if you have created your project using react-native-cli or ignite-cli, project folder will differ from what I will be referring to.
There it is. App.js. and as much as it is tempting to open it, let s first see what we can learn from README.md.
If we want to keep our project up-to-date we will need to update our dependencies, which should be quite a simple task. But beware of dependency compatibility. Create React Native App relies on 3 dependencies: react-native, react and expo, each being compatible with a narrow version of other two.
Not to forget, the expo also needs to have a specific SDK version, which can be set in the app.json file. Beside specifying SDK version, app.json can help us to name our app, give it an icon, version, specify supported platform, build details, and set many other settings.
Moving along we will see that we have 5 predefined scripts:
npm start or yarn startused to run the app in development mode. If you need to clear cache runnpm start --reset-cacheflag.npm testused for running test. The project is set up to use jest, but you are free to change it to your likening. If you decide to continue with jest, all you need to do is to create files inside a __test__ folder or with .test extension, and your tests will be ready running.npm run iosused to run the project on iOS Simulator. The same can be achieved withnpm startsince one of the available options is to run the app on iOS Simulator as well.npm run androidwill run the app on Android device or emulator. Keep in mind that you will need a device connected or emulator started before running this script. As for the previous script, same goes for this one, the app can be run on Android withnpm startas well.npm run ejectif you find yourself in need to add native code, do not worry, running this script will put you on the same track as if you have created your app with react-native-cli, but make sure that you have react-native-cli installed globally.
If you are unlucky, and things don t run smoothly on the first try, there is a list of troubleshooting suggestions related to networking, iOS Simulator not running, and QR Code not scanning.
We have prolonged opening App.js enough. So let s check it out.
import React from 'react';
import { StyleSheet, Text, View } from 'react-native';

export default class App extends React.Component {
  render() {
    return (
      <View style={styles.container}>
        <Text>Open up App.js to start working on your app!</Text>
        <Text>Changes you make will automatically reload.</Text>
        <Text>Shake your phone to open the developer menu.</Text>
      </View>
    );
  }
}

const styles = StyleSheet.create({
  container: {
    flex: 1,
    backgroundColor: '#fff',
    alignItems: 'center',
    justifyContent: 'center',
  },
});
What do we have here?
First of all, we can notice that code is written using ES6. I am assuming that we are all familiar with it to some degree. For those that want to learn more please check out this link.
React Native comes with ES6 support so there is no need to worry about compatibility. To ensure you how simple it is to write the code using ES6, here is a link to the code after it is compiled.
Moving along we can see <Text>Lorem Ipsum</Text>, which might be unusual to some of us. This is JSX, React feature for embedding XMLwithin JavaScript. Contrary to other framework languages that let you embed your code inside markup language React lets us write markup language inside the code. This is one of the reasons why we have React as one of our dependencies.
React
We need to be familiar with React if we want to write React Native, but if you are not familiar, you will still be able to follow along. That being said, we will look into two types of data that control React component and two different types of components.
import React, { Component } from 'react';
import { Text, View } from 'react-native';

const Greeting = ({name}) => <Text>Hello {name}!</Text>;

export default class GreetPeople extends Component {
    constructor(props) {
        super(props);
        this.state = {
            doeName: 'Doe'
        };
    }
    render() {
        const janesName = 'Jane';
        return (
            <View style={{marginTop:40, marginLeft:20}}>
                <Greeting name='John' />
                <Greeting name={janesName} />
                <Greeting name={this.state.doeName} />
            </View>
        );
    }
}
The code above is all we need, so let s break it down.
Functional Components
Also known as presentational or stateless components. They are dump components that should not contain any complex logic and should be used for displaying a specific part of context or as wrappers to apply specific styles.
const Greeting = (props) => {
    return (
        <Text>Hello {props.name}!</Text>
    )
};
----- or after shortening the code -----
const Greeting = ({name}) => <Text>Hello {name}!</Text>;
Class Components
More complex components that should deal with all necessary logic for displaying the content. React has something called component lifecycle and those should be handled inside class components. One of the lifecycle examples is the constructor. Some of the others are componentDidMount, componentWillUnmonut, and others. We will cover them as we go.
export default class GreetPeople extends Component {
    constructor(props) {
        super(props);
        this.state = {
            doeName: 'Doe'
        };
    }
render() {
        const janesName = 'Jane';
        return (
            <View style={{marginTop:40, marginLeft:20}}>
                <Greeting name='John' />
                <Greeting name={janesName} />
                <Greeting name={this.state.doeName} />
            </View>
        );
    }
}
I would like to note that we do not need to have the constructor in every class component.
Props
Props are used for customising the components. In our case <Greeting /> component has a prop name, and as we have seen we can pass it a string directly or we can pass it a constantan inside curly braces.
const janesName = 'Jane';
    return (
        <View style={{marginTop:40, marginLeft:20}}>
            <Greeting name='John' />
            <Greeting name={janesName} />
        </View>
    );
If we are passing prop, lets say fullName, to a class component, we will access it with this.props.fullName, while in a functional component we will use props.fullName (we will omit this keyword).
State
While props are passed from parent to child, the state is what we are going to use with the component itself. We can initialise the state in the constructor, but if we want to change it we should use this.setState() function.
It accepts two parameters, object that will update the state, and a callback function that will execute once the state is updated. We should not worry about re-rendering the component since it will re-render every time the state or the props for the component have been changed.
constructor(props) {
    super(props);
    this.state = {
        doeName: 'Doe'
    };
}

componentDidMount(){
    setTimeout(
        () => this.setState({doeName:'Alex'}),
        3000
    )
}
Ok! I think we had enough of React for now. Let s go back to React Native.
Styling
Well, sooner or later we will get bored at looking at same style over and over. So, what can we do about it? It s easy. We will create CSS file, add our style, and NO! React Native does not play that way. Styling React Native is not at all more complex. We will write our styles using JavaScript.
All of the core components accept prop named style which accepts an object that contains our styling that we write similar to CSS. The difference is that instead of dashes we are using camel casing (instead of font-family we will have fontFamily) and that our values, unless they are only numeric, need to be surrounded by quotations (color: blue is color: 'blue').
Without further ado, let s look how we style React Native component.
import React, { Component } from 'react';
import { StyleSheet, Text, View } from 'react-native';

export default class LotsOfStyles extends Component {
    render() {
        return (
            <View style={{margin:40}}>
                <Text style={styles.red}>just red</Text>
                <Text style={styles.bigblue}>just bigblue</Text>
                <Text style={[styles.bigblue, styles.red]}>bigblue, then red</Text>
                <Text style={[styles.red, styles.bigblue]}>red, then bigblue</Text>
                <Text style={{color:'yellow'}}>yellow</Text>
                <Text style={[styles.bigblue, {color:'green'}]}>bigblue, then green</Text>
            </View>
        );
    }
}

const styles = StyleSheet.create({
    bigblue: {
        color: 'blue',
        fontWeight: 'bold',
        fontSize: 30,
    },
    red: {
        color: 'red',
    },
});
There are two different approaches, somewhat similar to the inline style and class-based style. We can easily combine styles by passing an array of objects to style prop instead of an object.
Dimensions
It should not be strange to us that we can use height and width to determine component size on the screen. Also, we can assume that our dimension can be fixed and flexible. So, how we are setting each in React Native?
As for fixed, it is as simple as setting height and width. The trick is that all dimensions in React Native are unitless and represent density-independent pixels.
import React, { Component } from 'react';
import { View } from 'react-native';

export default class FlexDimensionsBasics extends Component {
    render() {
        return (
            <View style={{flex: 1}}>
                <View style={{flex: 3, backgroundColor: 'powderblue'}} >
                    <View style={{width: 50, height: 50, backgroundColor: 'orange'}} />
                    <View style={{width: '50%', height: 50, backgroundColor: 'green'}} />
                    <View style={{width: 150, height: 50, backgroundColor: 'red'}} />
                </View>
                <View style={{flex: 2, backgroundColor: 'skyblue'}} />
                <View style={{flex: 1, backgroundColor: 'steelblue'}} />
            </View>
        );
    }
}
Now let s check flexible dimensions. This can be achieved with flex property.
A component can only expand to fill available space if its parent has dimensions greater than 0. If a parent does not have either a fixed
widthandheightorflex, the parent will have dimensions of 0 and theflexchildren will not be visible.
While talking about flex, we need to say that we can use flexbox principles to layout our components. Something that we need to keep in mind is that flexbox in React Naive slightly differs from what we are used to on the web.
Flexbox works the same way in React Native as it does in CSS on the web, with a few exceptions. The defaults are different, with
flexDirectiondefaulting tocolumninstead ofrow, and theflexparameter only supporting a single number.
Components
Now we know how to apply a basic style to our app. Now we need something to style, and that something is React Native components. So let s take a look at a few:
View: the most fundamental component for building UI as div for web
Text: used for displaying text heading, and paragraphs for web
TextInput: used for inputting text into the app via keyboard input for web
StyleSheet: creates styles acts style tag for web
Image: used for displaying images same as img on web
Button: gives us buttons acts like button for web
Platform: helps us to determine either we are running our code on Android or iOS
Alert / AlertIOS: thename says it as JavaScript alert message
ScrollView: helps us to scroll the content that is higher or wider than our device
FlatList: displays similarly structured data; unlike ScrollView it renders only visible items
Touchable “components”: creates touchable views similar to anchor tags on web
Let s not go overboard with listing components. These are some basic ones that we will be using the most.
We have already seen how we can style Textand View in our examples. Styling others is not much different. For the full list of styling attributes, you can check the official documentation.
Conclusion
We now know how to create a project using create-react-native-app and we have a basic understanding of what we get out of the box when doing so. We have learned just enough React to be able to write code for our app, and we have shown how to style React Native component, as well as how to give it dimensions. In addition to that, we have mentioned fundamental React Native components to have us up and ready when we want to build a simple app.
The code used here can be found on my GitHub repository.